Showing posts with label singer. Show all posts

Sunday, 26 January 2020

Singer spade connector power connectors

I had a lot of trouble with these when I started with old sewing machines, because some had been rewired wrongly, and nearly all the rest were in need of rewiring.
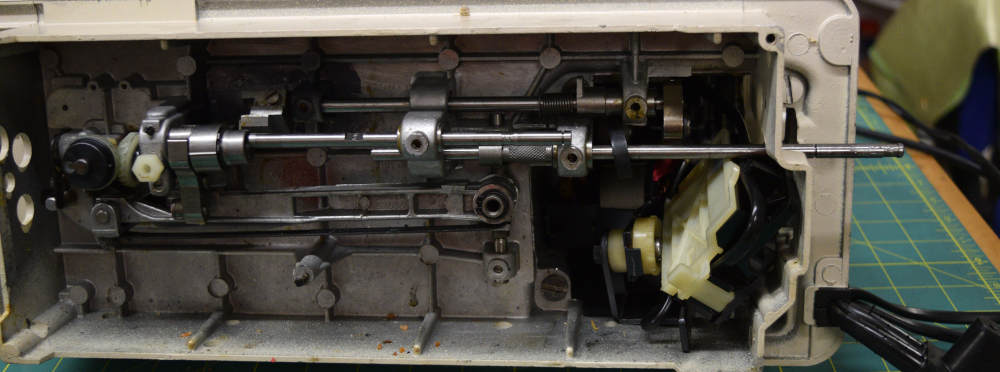
Here's the problem: Singer used rubber insulation right up until the 1950s, so if you have just bought a machine of that vintage, you will probably find that the insulation has cracked off, exposing the live and neutral wires.
If you don't rewire it, you'll need to make sure you have circuit breakers and good life insurance.
Just after Christmas last year a friend gave me her stash of old motors and foot controllers. She'd cut the wires on all of them so they definitely needed new wire anyway, but here's one I looked at this morning.
 
original wiring on both sides
The spade connectors were used on almost every electrical machine made in Kilbowie or Penrith. The US and German machines mostly used a solid round pin plug and socket, so I'm only dealing with non-US machines here.
They are all supposed to be wired like this, so if you (like I have) come across an occasional machine that's different, you will find it's been fooled with by someone and my advice would be to change it back. It's safer, and much handier if you have a lot of machines.
The wire on the left was the power cord, the one on the right was the foot controller. These ones actually look in pretty good shape, because they're the later type with plastic insulation. In Singer wiring, Yellow is live and red is neutral.
In the next photo you can see the replacement. Incidentally, you should make the foot controller cord at least 1.2m (four feet) or it may not reach the floor. In Australian wiring live is Brown and neutral blue, so I put them back in the same order. The foot controller wiring is not important, since it isn't dependent on direction and there's no earthing involved. If you switch the live and neutral, you may notice a disturbing mains frequency vibration in your machine. Not necessarily dangerous but it feels it.
I have colour coded them in the picture to make it really obvious. Mains power live on the right, neutral on the left. Foot controller wires are left (with the mains live) and centre.
Do not forget to place the circular clips over the new wires before attaching them to the plug. Shape the wires by wrapping around a thin screwdriver and 'tin' them with solder so they keep this shape and ensure that strands of copper don't wander or break off.

power from left spans outer pins, FC centre and right. It's a good idea, once you have the wires perfectly shaped for the contact, to stiffen it with solder. Alternatively you can use round crimp connectors, but the part the wire is crimped in makes it too large for my liking.
Now, you should note that I have also replaced the padding rubber with a similar width piece of plastic. The reason for this piece is to clamp the outer insulation and preventing the wires being pulled if you're a bit careless with the plug.If you don't do this it will all be loose and you will be able to see the wires inside. It wouldn't take much effort to dislodge the wires from the screws like this.

Finished controller.
Now screw the plug back together, replace the circular clips, test the plug and pat yourself on the back.
When using my own machines, I make a habit of not unplugging the power plugs. It's easier and tidier to put the presser down on a small piece of fabric then the needle down and wrap both cords in opposite directions around the machine before placing the lid back.
And here's a wise saying I learned as a child "There are old electricians and there are bold electricians, but there are no old, bold electricians". 

Sunday, 30 June 2019

1970s Singer bobbin gear replacement

I was asked if I could fix someone's Singer 514 because it "didn't work".
The patient

A cursory inspection told me that the plastic bobbin drive gears had broken (needle moves and bobbin doesn't when the hand wheel is turned).
This is a very common problem now since the gears last about 40 years before they become brittle enough to break apart. It's probably why these machines don't have much value now, and most people will just throw them away rather than pay to replace them (particularly here in Australia where labour costs a lot). I don't know how long replacements will last, but I imagine you'd get 20 years at least.
I've done this job before, on my daughter's 498K Stylist in 2012. As I remember, the gears for her machine were much better quality than these, but it seems I can't get good ones now.
Where the bobbin gear lived and died

I told her the bad news. Although gears are available (Chinese made, and quite poor quality), the labour cost would exceed the machine's value. She was still keen (she had bought it new in 1973) so I ordered the gear set - they must be replaced as a set because the new ones are cut differently and won't mesh with the unbroken original, and even if they did mesh the unbroken one would break very soon too.
Pre-requisites to doing this job are:
1. You have the replacement gear set in front of you (I ordered them from Amazon).
2. You accept it will take a couple of hours if you haven't done it before, and do the whole job on the same day. You might be surprised how much you can forget in just a day.
3. You know how to time the hook.
4. Have some Singer gear grease on hand.
5. An appropriate Allen key and other tools to remove circlips.
6. Take photos as you go. These pictures are specific to the 514. They're all similar but don't count on them being identical.

Gear replacement

Disconnect the power (duh), remove the machine from its base and remove the bottom plate.

The bobbin mechanical components are then exposed
It's now obvious where the broken gear was.
Our task is to remove both of these shafts and replace the gears, but it's not as easy as you'd think. This is why it takes multiple hours instead of half an hour.
I had to remove the good gear first. Start by removing the circlip at the end nearest the motor (to the right in my pictures), then everything that's holding the shaft components on, including the white plastic gear on the left. You shouldn't need to force the shaft out.
Removal required an Allen key
Here's the shaft halfway out: The eccentrics for the feed dog should just sit there, held in by the rest of that mechanism.
All free and halfway out
The other shaft was tricky. It would not exit easily, and I had to remove the motor mounting in order to get it all the way out (to the right).
Almost there.
It's obvious from this photograph why the motor needs to be removed. The change from the old external motors to these quieter ones necessitated some compromise, and removing and replacing the motor was quite a struggle.
Once the two shafts are out, replace the gears and reassemble. Here are the new ones installed:
New gears installed
That big pointy bit of plastic fouls the movement of the other gear and causes a rough spot on the machine. You might be able to carefully remove a little to eliminate the rough spot, but I left it alone.
This is why I mentioned that the replacement gears are poor quality. It's not hard to make a copy of something this simple, but the people tasked with it still managed to screwed it up.
However, the machine does work acceptably now, where it didn't before, and the stitch quality is as good as it was before the original gear's demise.
After you've got everything back together you will need to correct the machine's timing, because you will definitely have changed to to unacceptable.

Feed timing

Make sure the feed dog is doing what it's supposed to be doing.
When the needle descends to the work, the feed dog will be moving downwards. If I remember correctly the offending plastic protrusion points towards a line etched into the feed timing eccentric (both of which can be seen in the picture above, taken before I'd replaced the latter's grub screw). Align these and you should see correct feed timing. If not, set it manually.

Hook timing

The settings are pretty universal for hook timing. You want it set up so that as the hook passes the needle, the needle has started to ascend and the needle's eye is 3/16" (2mm) below it, the needle position set to the centre. My friend Tammi has much more detail on this on her web site.
This is the setting for every sewing machine

Saturday, 14 July 2018

1950 Singer 103K2 Home Manufacturing

I got this one a few months ago for the bench, but the machine head was so good that I cleaned and serviced it, replaced the electrical cords for the light (they were completely perished as usual) and tried her out. Very smooth, and precise, and it's now my favourite machine. It has the original Singer home industrial universal motor, from which I removed the capacitor (it's just a matter of time that these will give you trouble) and I also replaced the motor wiring. Capacitors can be totally removed without causing any noticeable difference, unless you listen to AM radio when sewing.

These lights are almost always in urgent need of rewiring

Replace any perished wire. Capacitor is the box top-left

Live wires are at the yellow connector. That one has no insulation


After the spruce up, she's looking great

Singer 132K6

I haven't posted for ages, and a lot has happened.
One of my older adventures was buying this little (?) beauty a couple of months ago.
It was made in 1938 and is a walking foot industrial machine intended to sew multiple layers of heavy fabric (leather, canvas). It works really nicely on modern vinyl too. It's a little noisy but powers through just about anything. Previous owners oiled it when they knew I was on my way bless 'em, but they didn't care much about how the machine looked. The table is terrible and I'm on the look out for a replacement, and it took ages to clean the head and motor. I checked all the wiring and added an original Singer industrial machine light (not the clip-on 1950s thing in the picture).
The motor was full of insect casings and must have been left outside (but under cover, as it wasn't completed rusted).
It was miraculous the motor worked at all

Later ones have a reverse, but not mine. The picture doesn't really show the size of this baby. She's large and very heavy.
Seriously thinking about re-making my car's rear seat. Previous effort was nothing short of horrible, due to not having one of these. This is still the number one choice of upholsterers in Australia and consequently these usually sell for $1,600 - $2,200.
Needles are much longer and larger than regular industrial needles and start from size 21.
If you want a walking foot machine to sew vinyl or leather, here it is. They're usually called just 'K6' by upholsterers.

Friday, 26 May 2017

Which way does my needle go in? Which way do I thread it?

If you're something of a vintage sewing machine aficionado (hoarder) you may occasionally experience some confusion when you go to change the needle or just thread it.

Luckily there are two rules that are always true with sewing machines, but you have to look closely to check the first one.

Simple rule #1: The flat side is nearest the hook.

This one requires you to look at which side of the needle the hook is on. In Singer 66 and 99 the hook race is very large, and the hook actually passes the needle on the outside. That is, the hook is to the right of the needle. Following simple rule #1, that means we have the flat on the right.


Models 66 and 99, the hook is to the right,
so the flat is too.

Model 201, smaller race means the hook
is on the left, so the flat is too.

Simple rule #2: Thread also goes toward the hook

That means the thread always exits the needle on the hook side.

Vertical bobbin machines are a bit harder to see, but as soon as you see the hook, you know how to put in the needle and how to thread it. This will maybe save you a lot of time looking for manuals.

Sunday, 1 May 2016

Singer 201K2

After watching The Dressmaker I wanted a 201K2 and it seems that these were never sold in Australia. Thought of bringing one from the U.K. where they're not that uncommon, or converting a 201-2 from 110V but this didn't seem sensible.
Exactly a month ago I won one! It appeared on eBay and finished at 3:30pm when nobody would be watching. I still paid $111.50 for a machine that was in really awful condition. The wiring was actually melted and it needed a complete overhaul.

So, I got it working by my birthday (2nd April) and sold all my other 201s because now I had a rare one. Possibly a bit premature, the motor made a loud rumbling noise and wasn't at all the quiet rolls-royce purr I was expecting.
In the middle of sewing a jacket today I stopped and decided this was a great time to recondition the motor. Nicholas Rain Noe has an excellent article on this and the U.S. version is the same, just for a different mains voltage. I believe the grease might have had something to do with the reduction in the noise but it's still not whisper quiet.
Elusive 201K2
In the first scene of the film Kate Winslet is carrying an empty case. How can I tell? This baby weighs almost as much as she does.

Wednesday, 2 March 2016

Singer 206, 306, 319 and 320 timing

There are loads of these around and a lot for sale, so one you've modified the bobbin case to use normal needles, you'll probably want to learn how to ensure the hook is timed. Why? Good question, because these models have a tendency to go off due to the screws holding the bobbin drive to its shaft not being tight enough or maybe you tried to sew something too heavy and it slipped slightly.
This never happens with straight sew models, or I haven't ever had to set hook timing on them but quite a few 319s I've bought have needed to be timed. The other thing that commonly causes it is some dim wit in the past has tried to adjust the hook timing thinking it will allow them to use 15x1 needles.

Here is the procedure to check and correct the timing:
Step 1: Remove the end plate (cover of the needle bar) and the needle plate (slide plate) and tilt the machine back. Needle should be in the central position. Remove the bobbin case.
Step 2: Move the hand wheel toward you until the needle has descended to its lowest point. Now you need to check the marks on the top of the needle bar:
At the very bottom, the lines on needle bar and machine should line up
 If they don't line up, either the needle height has also been changed or (more likely) the static mark on the machine has been moved. If the height is wrong, you'll find out in a few minutes, so assume it's the little plate that has moved. You can see there's a screw just under it. Undo it and move the plate so they align.
Step 3: Move the hand wheel while looking at the needle bar marks. Stop when the lower needle bar mark lines up.
Needle has started to rise a little
Now check the position of the needle
Hook is exactly behind the needle, and should almost be touching it.
If the hook is not in the right position, Loosen the two screws holding the bobbin drive in place slightly and move the bobbin drive until the hook is the right spot.
Loosen (do not remove) the screws holding the bobbin drive to its shaft.
Now tighten the screws back up and do the test again. If it's still perfect (it might have moved when you were tightening the screws) make sure the screws are quite tight and check the needle bar height. Put the needle in the left position and turn the hand wheel until the hook is just behind the needle. The hook should be just above the eye of the needle.

I think this procedure is pretty important to know, even if you only have one machine. If you can't get the tension just right on your swing needle machine you can be fairly sure the hook timing has wandered a little.

Tuesday, 23 February 2016

Servicing your 201K part 2 - cleaning

This is really quite easy to do. There are two things to remember when oiling your old domestic machine:
1. Clean first, then oil
2. Only one drop per oiling point, except the presser bar wick
If you want to do it properly, you should remove the hook mechanism, which may never have been done. Here's how to do it:
pull slide plate out
angle it so it comes out, avoid damaging the enamel
remove needle, foot and bobbin
Clean out the dirt. Most will be really filthy
nylon brushes are excellent
This is removed next. It's going to be hard. If you can't, clean around it
remove feed dog screws
prise these two lugs outwards a little
lugs out, wedge a screwdriver so hook comes off when wheel turned
lugs have moved, hook is ready to lift off

clean everything so it's at least this shiny
to reassemble, the screwdriver will be on the other side, wheel turned opposite way
Now, put the screw back in and tighten it. I mean it has to be pretty tight. Put a single drop of oil where the hook rotates (metal against metal - general rule of oiling, as is the single drop on each oiling point).
Replace the bobbin and slide plate. Again, careful not to damage the enamel and put it in at an angle.
Well, now we have that over, move on to the end plate. Remove it and notice that every piece of moving steel has a small oil hole. If it doesn't or you can't find it, oil it anyway.
Take note of how stiff the hand wheel is before oiling this then compare it again afterwards. It's my experience that this area contributes most to a machine's stiffness, so you'll be doing the most good here.
turn the hand wheel, oil every joint and the needle bar
Here are just two points. Exactly one drop each.
Also soak the brown wick at the top of the presser bar. Might take 5 or so drops, but don't overdo it or oil will ruin your sewing for months. You can see in that last picture that the top arrow points to a hole, the bottom is pointing at the needle bar. Exactly one drop each is a very simple rule.
Now, tip the machine back. I rested mine on the lid turned sideways. Turn the hand wheel to see what moves and oil it. Remove the two black metal covers and oil in there too (marked with arrows), or vaseline would be better for this, since it will stay a lot longer. Vaseline closely matches Singer's gear and motor grease, which isn't available any more.
If aluminium, the serial number is stamped underneath

At this point, if you're used to modern machines you might be wondering why on Earth you have to do all this when you don't on the modern plastics. Here's why: Plastics have oil included in the plastic and when it runs out, if your machine lasts that long, you are expected to throw the machine away and buy a new one. When your 201K was made, this would have been unthinkable. I developed the habit of cleaning and oiling after every eight hours of sewing and be happy that my machine sews a perfect stitch and will last forever. At the same time, replace your sewing needle. 
Just a few places that need a drop
There are actually quite a number of places that need oil underneath, so make sure you spend some time on this. The manual has quite good instructions too. Yes Singer intended for the user to service their own machine! How about that?
Several oil points on the top
Finally, remove the plate at the back
someone has greased it
It appears that someone has applied a bit of grease to the gears. Singer recommends oil, and oil on the mechanism on the left (which usually gets oil from the oiling hole on the top). If there's heavy grease on the gears it will noticeably slow the motor and you should clean it off. This grease doesn't seem to have affected my machine so I left it alone.

Now, the other things are to look at the drive belt. If it needs a new one, do not buy a round rubber belt: Those belts cause the motor to strain. Get a fibre belt like the machine is supposed to use and adjust the motor so this belt is loose. It is not like a car's fan belt, where tight is good. If you over tighten the drive belt on a sewing machine it will slow the motor and wear the bushings out very quickly. It will also give you poor control over the speed, so keep it as loose as possible without slippage.
The original bulbs were 25W and were extremely good. When I buy a machine it normally has the original Singer bulb or a 1960s 25W replacement that still works. Really, they made things that well a long time ago. Still, they get very hot and you might be better off with a 15W replacement. They produce the same amount of light but the burn you sustain when you touch it is only second degree instead of third. Saves on hospital bills and skin grafts. I buy Riva bulbs which are exactly the same size as the original and they're still made in Germany.

The exterior

If the exterior is a bit dirty, clean it with a cloth and some sewing machine oil. It's the only substance guaranteed not to damage the finish. Only down side is that it's so gentle you might be there a while. Pure car wax works nicely if you want a deep sheen. The later ones were painted with enamel (earlier were Japanned) so you can use car paint products on keeping it beautiful.

Remember: Important

201s have the needle flat to the left and thread right to left

Servicing your 201K part 1

In Australia and in the U.K. there are loads of these machines around. There were literally millions of them made because they were so good Singer made them from the 1930s until the 1960s. A straight stitching machine in the 1960s that cost more than any zig-zag, free arm machine and people still bought them. Why? What's so good about them?
Firstly, Singer made these with special hardened steel gears, so they were as tough as nails. They had an incredibly simple system of getting the bobbin moving (just one bar underneath the machine) which performed a perfect stitch on both the top and bottom, and it could stitch everything from silk to leather. Just about any machine can be made to sew through leather but the 201K can do it easily**.
** As a side note, sewing through leather is easy enough, but leather tends to get dragged back by the presser foot and will bend and break your needles as well as screw up the stitching (and with leather, there's no second chances). To properly sew leather on a sewing machine you need a walking foot (even feed foot) which moves the work from the top as well as the bottom (the regular feed dog), or a wheel feed and foot, which Singer made several models of.

Now, next thing you should know is that the 201K has two forms: The early cast iron one and the later aluminium one. Here they are:
1936 201K3 cast iron weighs a ton!

The 201K23 (201P) weighs half as much
They look radically different because aluminium is so much weaker than iron that Singer had to redesign the head to make it stronger. The stitching mechanism is identical in both machines.
Technically the cast iron version is a 201K3 and the aluminium one is a 201K23, but it's really not important.

Electrical first

Okay, so you have your 201K on the bench, what's the first thing to do? Firstly, check the wiring, particularly between the motor and light. You can see that the one in the photo isn't that great, but I'm aware of it and will be replacing it. Replacement is not trivial and I have a blog entry devoted to this. See here for replacement of the Singerlight wiring.
This is usually the wire that goes first

Check both sides of the bakelite plug

1950s vinyl insulation does not last forever, especially in Australia. It cracks and flakes off. I heard recently from a guy in NSW who said that all old Singer motors are death traps and none of them would ever pass a safety inspection. He has good reason to say that: He imports and sells cheap quality Chinese replacement motors.
Here is my experience: I have fixed literally hundreds of electrical machines and none has ever been a problem. Also, I had one that had been tested and had a safety tag on it when I bought it, so I don't really believe this. If you choose to buy a second hand sewing machine that doesn't have a safety tag on it, you are expected to take full ownership for getting it tested, and the device will have a label saying just this. You have been warned. If you don't know what you're doing and the wiring is suspect, don't plug it in or you might kill yourself.
The wiring is by far the most important thing to check in the same way the brakes are if you buy a second hand car. It's the thing most likely to injure or kill you if it's not good.

Foot Controller

These came with radio suppression capacitors, which are a problem when they fail. Their purpose is to suppress AM radio interference and they also suppress some of the sparking inside the motor. When they fail, they bridge the electrical connections inside the controller and your machine starts sewing at full speed all by itself! All sewing machine repair people I know remove the capacitors. I wrote an earlier blog entry here on these, and the example was the twin capacitors. Here is the procedure in pictures for the single capacitor version:
turn over, remove screws, push the button on the other side
It's the grey thing. I've disconnected one side
disconnected. It would work perfectly well now, but remove it

before putting it back, drop of oil here and around the button