Saturday, 23 May 2015

A Pack of Jeans that never runs out

Good Jeans need never die

I went to Sydney three years ago for the '50s fair and did some vintage shopping that weekend. Found a pair of 501s made in Australia, presumably in the 1980s and the tag inside said "Women's". Since I'd already tried them on and they were really comfortable I bought them.
Now the poor old things were on their last legs (pun intended), so what do I do? Cry about it or sew a pair exactly the same but without the rips?
Poor old things
During the week I went to my fabric shop and bought 2 metres of heavy (210 gsm) black drill. During the '80s when these jeans were available the black ones looked really good too.

Step 1: Making the pattern

This was really easy. No paper involved here, just the jeans and pair of snips. Undid all the stitching in one side of the garment. I chose the right side because of the change pocket. The rivets will stop you separating the whole thing, so cut around them. Don't attempt to remove the rivets, the fabric will rip before they come off. There is a lot of chain stitching in jeans, and there's a trick to undoing this. I've never been great at it but it's all one thread so in theory if you snip a particular thread at a particular end of a seam, you will be able to pull it and undo everything in seconds. I scored a few times but it took a while.
The reason for only unpicking one side should be obvious: You need a finished garment to see how it goes back together. Also, take loads of pictures. Every seam you undo and perspective shots. I'm a belt and braces guy because I've run into trouble so many times.
Might also be a good idea to write down the order you disassembled.
The unpicked side is your pattern, in case you haven't guessed. Here are 18 pictures of the process.
Pockets are not
the easiest
Take pics of the
stitch patterns too.
Where are the
belt loops?
This tells you
the order of
construction
Button holes
are key hole
Belt loop bridges
waistband and
main garment
Can't take too
many pictures
All details need
to be reproduced
Except the rivets
How the pocketing
goes on
and again
Where are things
attached?
How far pockets
extend
What stitching
looks like from
the inside
Look at that:
Raw edges are
folded.

Step 2: Layout for cutting

Now, fold your drill so the selvedges are together and the right sides are together. Something I noticed with making clothes is that they're usually cut along the fabric, so that's what I went with here. If it hadn't been right I'd have noticed by now. I made them three weeks ago, worn nearly every day since, so they're good.
Lay the biggest
pieces down
The little ones
will go around
Now, all pieces except anything that requires only one piece of fabric (change pocket and fly) goes around the bigger ones. Make sure they're as straight as possible: The straight grain is fairly important.
Make sure you add a seam allowance where required. You can do this any way you like, but I have a great little double wheel tool, with adjustable gap. One wheel goes around the edge and the other marks the new one.
The reason the raw edges folded is exciting is that you won't have to finish the edges at all. Very little on this garment was overlocked.
Also, the chain stitch will have to be replaced since I don't have a chain stitch machine (the 411g could have done it but I never got the special needle plate). What machine to sew jeans on? I chose the black 201K23. This was a "no brainer". Well, I could have used an industrial machine but it's getting a bit cold in Melbourne so a portable in the lounge it is. A couple of people, incidentally, have been quite surprised that a domestic machine was used to make these. New plastic machines would stand little chance. That's progress for you :-)

Step 3: Cutting


Well this is obvious. Cut the pieces out and leave pinned to your 'pattern'.
Cut an appropriate width extra for making belt loops. You should unpick one of the original loops completely and do some maths to work out how much you need. Cut the strips into their pieces and you don't need any seam allowance here.

Step 4: Make the Pockets

Something else I've noticed is the order to construct a garment. For any garment, pockets need to be made first. The top pockets are the hardest thing to do as usual, the rest is relatively straight forward. Make the pockets look like the old ones. You will be cutting the internal pocketing out of 100% cotton poplin. If you want it to look like the original, use white. Poplin is extremely cheap and a metre will do a lot of pockets.
The back poskets are 'patch pockets' and are really easy. Draw the pattern that matches the original (or a different one - your jeans) with a dressmaker's pencil and stitch in orange thread.
Could have been a better match, but I'm not going
stealing the design, just making for myself.

Pay careful attention to where the pocketing gets folded and where it needs to be sewn on the jeans. I got this wrong a couple of times before getting it right. This is why the pockets are a bit more challenging. The more experience you have the easier this will be.
original, holes marks where the rivets were.

Step 5: Prepare other garment pieces

Most of these are simply prepared with raw edges folded to the wrong side. Fantastic news, because all you need is a hot iron (turn it all the way up, to cotton/denim and possibly turn the steam on). If you have a steam press, this would be a good use for it. If you have to pin it, don't use plastic headed pins, might seem obvious but if you do they will definitely melt into your lovely fabric and ruin it (no I didn't do this).

The fly was the only piece I had to overlock, and my old Japanese Singer was easily able to do this. As soon as it's overlocked, compare the piece with the original, mark your buttonholes and make them straight away.
So far you've constructed the pockets and folded your pieces.

Step 6: Prepare your machine

You will need to have a machine threaded up with heavy orange thread and one with heavy black thread. I used the same one only due to space considerations, but 201s are very cheap and I do have two of them. Another thing to consider is this: Same thread in the bobbin. The heavy, strong cotton I used was very thick and I did have to make a couple of modifications to my 201K.
1. Fill bobbin, and notice that it doesn't take much thread. Just a fact, bobbin only holds a Certain amount. If it's three times thicker, it will be only a third as long.
2. Modify your bobbin tension. Pull the thread through the needle plate. Initially it will be extremely tight, but you must loosen the tension spring until it isn't otherwise you won't get abalanced stitch.
3. Change the needle. You will need at least a size 18, possibly a 20 but whatever size the thread goes through comfortable. Do a test sew. When mine stitched it sounded like it was hitting the table with a small mallet! Industrial needles will work in domestic machines. I used a 16x231 which have a round shank. Just make sure you put it in the right way.
4. Do a test sew. Use contrasting thread so you can clearly see that the stitch is balanced. I had to dial the top tension to 7 to balance the stitch.

Step 7: Sewing it together

When you sew the inner part of the legs, you must do the orange top stitching straight afterwards. You won't be able to do this after the outside has been stitched. Same goes with anything else that's top-stitched. Do it as soon as you can or you won't be able to do it at all.
Use the intact 'jean' to see how it should look. The fly is only on one side (the left) and the buttons will be put directly on the other, non-fly side.
The fly should match the detailed pictures you took. You did take detailed pictures, didn't you?
With the leg seams you can hide them by doing french seams (tends to be bulky) or the preferred method is flat-felled seams, which is how jeans are usually made. You can experiment with spare pieces of fabric. Normal seams are even acceptable, which you can finish by pinking or even overlocking (how modern). Rather than reinventing the seam, there's a good explanation of how to do this at http://www.sewneau.com/how.to/flat.felled.seam.html

Step 8: Waistband and belt loops

This is easier than belt loops for a dress. These jeans were much easier because it doesn't matter if the stitching shows. Prepare by pinning the waistband to the rest and mark the position of the loops (compare with the original waistband).
Make the buttonhole.
Buttonholes use normal weight orange thread
Sew one side of the loops onto the waistband first, sew the waistband to the jeans then the other side to the jeans. This will be hard on your machine: You'll be sewing through many layers of heavy drill but with a 201K, if you can fit it under the foot, it will stitch it. This is also true with most of my machines.

Step 9: Buttons

Bought these from Clegs for about $3.75 a set. Extremely easy to install.
1. Punch a hole in the fabric where each one will go using a hammer and nail.
2. Using the hammer, hit the button's 'nail' into the other bit
That's all, Just hit it firmly and it stays put. I hear you can get buttons put on professionally but I doubt it would make any difference.

Well that's it. Want to see what I ended up with?
Not a great selfie.
They look better
in reality.
I also turned them up too much. The top stitching should have been much lower. I'll be fixing this today.
Total cost = $28.75 not including thread or needles. Yes I know you can buy a pair for less in K-mart but are they as good? Are they made by a person who loves doing this or a slave? Also, I have the pattern and experience now. Hmm... maybe a pair made in tartan or polka dots next :-D

If you don't have a 201, well first of all why not? They regularly sell for less than $100 (I've bought a dozen or so and none was more than $50) and secondly you can do this on any older full size machine. A model 15, 66 or 27/VS2 would hammer this garment into shape pretty easily too.

Friday, 15 May 2015

Embroidery on old sewing machines

Before you start

Make sure your test fabric has been backed with interfacing. You will get a much better result from doing this and even the 1911 book recommends a backing fabric.

Using your automatic patterns

I had a look at doing this a while ago on my 320K2 and it seemed to do a really nice job. Things I learned about embroidering on 1950s machines are:
1. Zig-zag is useful when creating a really thick line.
2. So is built-in patterns and pattern cams.
3. So is your machine's ability to do a really short stitch.
4. If you don't have a machine with cams, you really only need zig-zag. You can move the lever as it sews to make just about any pattern.

I have to say that my Pfaffs have been extraordinarily good at all of this, particularly at achieving a very small and accurate stitch length. The idea with all of this is to use the machine to do most of the work. Break the picture you want to make into patterns covered by your machine's cams then just go for it.

The Necchi Supernova is really unbelievably good at patterns, since it will go backwards to achieve the pattern you want. First time I saw the Necchi do this my jaw dropped. It was like an electronic machine, except totally mechanical and 60 years old. What a machine! I just have to fix mine and I'll be happier to experiment some more (transformer blew up).

Using free motion on a straight stitching machine

This needs to be explained first. Free motion refers to placing the work in an embroidery hoop, Removing your machine's presser foot so there isn't one there at all, and sewing slowly while moving the hoop to make the pattern in one hand while using the other hand to press down the fabric right next to the needle.
This technique is described in the Singer embroidery book of 1911 (no longer in copyright so go for it) and it specifically mentions models 66, 15 and 27. It's pretty much accepted that machines with drop in bobbins (the 66) are less satisfactory doing this due to the 90 degree turn the bobbin thread needs to make, leading to loose threads. I haven't experienced this at all and don't have a spare 66 to test, just quoting what I've read on various forums.
I tried this on a 319K (not a straight stitcher and a vertical bobbin machine) and the results were 'mixed'. Stitching in the normal direction worked beautifully, but when I attempted to go any other direction, the thread wouldn't catch. Here is the best I could do with the 319K (the word 'Mike'):
I had to turn the work so it was always sewing in the same direction.
Another problem I had was forgetting to put the presser bar lever down before sewing. The lack of a foot makes it easy to overlook, and if you do the bottom threads will be extremely loopy (because there's no tension at all on the top). Also on the 319, the feed dog was dropped.
The word 'Audrey' was done on my 1891 VS2 ('vibrating' bullet shuttle) and with this machine the feed dog doesn't drop so it needs to be covered (the feed dog interferes with the fabric movement). Any vintage buttonholer will have an appropriate plate, so screw this in place before starting.
I was surprised that the 1891 machine performed so much better than the 1950s vertical bobbin, but it definitely did, so I'll leave the green machine for automatic patterns and the VS2 for free motion work. The VS2 had no trouble at all with anything I tried and didn't skip a single stitch in any direction. I tested both of these machines by sewing a circle and the VS2 did it beautifully.

There are a lot of good instructions in the book, so if you like an older machine, this is for you. I'll be playing a lot more with it in the near future.

Thursday, 19 February 2015

Dishonest eBayers

I sold my 29K58 a few weeks ago to a guy who sounded nice enough on the phone. He said it was for himself and he was short of money so could I let it go for $230 (was advertised for $250).
Of course I let it go. I like to help people out and at least he wasn't a lying dealer, right?
Yesterday I noticed a strangely familiar 29K58 on eBay


Yes that's definitely my machine. The decals I applied a few weeks ago, the fresh paint, the take up lever I accidentally broke in the car last year.
I really hate being lied to. Everything this guy said to me was a lie.
This says "
ANTIQUE SINGER 29K58 INDUSTRIAL LEATHER SADDLERY BOOT MAKER SEWING MACHINE

This has been a great feature in our home for many years. We have never used the machine.
It looks complete. May need a service to operate it.
Pre purchase inspections are very welcome. I am located in Hawthorn Victoria for collection.
Would make a great feature in any home.
**Please View My Other Singer Sewing Machine Auctions**"

It's not an antique, it's not complete, it doesn't work (that's how it was advertised), and it has never been in his home until he bought it as a broken machine a few weeks back. He knows the take up lever is broken and there is another part broken at the back. Unfortunately there is nothing I can do via eBay: Dishonesty isn't against their rules.
Now I know not to let a valuable machine like this go without repairing it and selling for at least 80% of the going rate. So thank you jamesvk3 for giving me a reality check. Your ridiculous level of dishonesty for your fellow man will ensure I'm more vigilant and no more bargain selling. Lying and ripping people off (I mean the buyer, not me) isn't on.
I assume that if some poor sucker buys it, he'll shrug and tell them he knows nothing about sewing machines (which he sells a lot of) and did offer pre purchase inspections. If you buy it, I'm willing to testify that he sold it under false pretences.
Justice would see it fall on him.

Sunday, 15 February 2015

Bernina 730 Record and oscillating vs rotary hook

Bernina 730 Record


I won the 730 on the auction site last week and only bought it because it was cheap (they usually go for much more). When I got it home it was way better than I expected. It hadn't seen all that much use, particularly for a machine made 49 years ago. This is commonly described as identical to the 830 Record but with an all steel body. Not sure why they aren't worth as much as the 830 but I've had the latter and this machine felt better, smoother and generally nicer. Also heavier of course but that shouldn't bother me for another 20 years or so.
This machine came with an adaptor for short shank feet (so I could use Singer feet if necessary) but it came with nearly every standard and optional foot. I stole one from the 530-2 and it seems to now be complete. My friend described her Bernina (a 740 Favorit) as "just very pleasant to sew with".
The machine has the same 20 built-in stitches the 830 has. 
Oh, and she's a keeper: Just too nice a machine to part with.

It's a free arm. Table removed with simple lever.

Amazing condition and very shiny

Accessories swivel and don't have to be removed


What's with all this hook business?


The 740 has a full rotary hook (the hook keeps going around in the same direction) but the 30 somethings (530, 630, 730, 830) are all oscillating hook machines. I used to think the rotary hook must be better since it didn't have to keep stopping and changing direction, but that's not necessarily the case. Industrial machines nearly always have rotary hooks because going continuously in the same direction means they can go faster. However there are exceptions: The domestic 201 Singer has a full rotary hook while the 31-20 industrial (the tailor's machine) has an oscillating hook. Also, all model 15s are oscillating hook, and the 115 has a rotary hook. The 15 is widely considered to be a better machine than the 115, mostly due to the heavier components but the rotation of the hook seems to have no bearing on its abilities. The 115 was dropped about a hundred years ago, in case you were wondering. My conclusion is this: Rotary hook is fantastic for speed but tailoring and flexible domestic machines seem to favour oscillating hooks. The 201 is pretty hard to beat, but it only stitches in a straight line (and it does this perfectly).

Monday, 9 February 2015

Dressmaker dummy for collars and sleeves

I've been making a few shift dresses lately and noticed that one of the really hard things in dress making, putting in sleeves and collars.
It's lining everything up on a flat surface that's difficult, but with a dummy you can set the correct size for your dress and pop the sleeve, collar or facing on quite easily. All of the marks line up perfectly. Dressmaker's dummies are available new or from collectable shops, garage sales etc. This is Diana: She's fairly old and English. I had to lubricate all the dials (they were quite rusty and some seized).
The pattern is Simplicity 8775 (1970) "designer fashion".
The only thing I wasn't completely happy with was that I used an invisible zipper. They did exist in 1970 but weren't very common. The fabric is old too so it's a brand new old garment.
Sewn on my 320K2.
Here are some pictures:
Pinning the neck facing - easy!

And the sleeves - also easy!

Needs a press but isn't it lovely?

Arm facing. The white fabric is to prevent pins from catching.

And the back, with the invisible zipper.

Friday, 12 December 2014

Harrington in detail part 3

The last part for sure, because I've finished it now. Probably could have done it in one day if all things had gone smoothly, or maybe I'm just being stupid.

Before we start

Attach the lining to the self under both arms, joining the seam allowances (will not show). The other places we join the lining to the self are the cuffs, the bottom and the zipper.

Ribbing

This is the hardest thing to find these days. Not sure why but if you plan to make an English style bomber jacket, the ribbing for the cuffs and bottom must be a very close match to the self. It's not expensive, just not around a lot.
2 x cuff at 15cm h x 18cm w
1 x hem at 15cm h x 73cm w
The cuffs must be closed, i.e. stitch the ends so you have two 15cm high cylinders.
Now, put the cuff over the self so the rib looks like a sock. To make sure it is even, you will have to mark 1/4 way around each and match the marks. A basting thread (small stitches) will help it to stay there as you sew, or you can pin the quarters and stretch the cuff carefully as you sew. If you pull the fabric as it's being sewed you'll bend the needle so it will break onto the needle plate (so don't). Sewing stretchy things onto unstretchy things is something you work out after a few mistakes.
Now sew the other right side onto the lining. It's been a couple of days since I did this so I can't recall exactly how I did it, but I recall having to poke the ribbing inside what I was about to sew, so there was an exposed seam. This was the only way I could to make a really neat job. There was also a lot of pulling things inside out.
After you've done this, it will look like this:

Can you see where I pushed the ribbing in to be able to stitch?
After stitching, we pull the self from the lining and have them obviously joined by the cuff.
Looks like a mess, but...
 Now, pull them the right way.
Finished cuff
Now you need to join the self to the lining. Topstitch around where the cuff joins the self. If you didn't do this, the lining would be free to slip around and you'd end up with a varying size cuff.
Do the other side now.
The bottom rib needs to be joined to the small pieces of self we interfaced.
Might need a ball point needle
Now turn the garment inside out through the zipper space. You should see that we're running out of places to turn it inside out, and our aim is to sew the zipper in last of all.
Mark the rib and self into halves then quarters (ignoring the interfaced piece).
Stitch the end pieces (the interfaced pieces) one side to the self and the other side to the lining so the self and lining aren't joined (if you join the lining and self at this place you won't be able to insert the zipper). Now join the ribbing piece to both the lining and the self (all four layers together), matching up the quarters.
Always pin then baste before sewing.
Turn the garment the right way, and inspect your good work.
Beautiful!
Not quite done yet. You need to baste then top stitch down the join of the interfaced self and the ribbing.

The Zipper

Zippers aren't that hard. Just make sure the first half you sew on is on flat, then don't position the other half unless the zipper is closed. It's a real pain undoing a well sewn in zipper so make sure you're careful.
The logic of getting this one in is simple because it's reversible. Both the lining and the self must be folded and the zipper will sit on top. We can also use still being able to access the inside to make a very neat job. The lining and self are firstly folded and this is pressed into shape. Pin one half of the zipper into position on the folded part (the placket), making sure it's not too long (hard to correct for). Baste and remove the pins.
Never just pin a zipper, or it will end in tears
Once you've made sure you have only sewn it to the folded part, check it for straightness. Once you're happy with it, sew into position using a zipper foot. Don't try and reverse over the stitch with this foot on (it usually doesn't work), instead pulling both sides of the thread to the wrong side and tying them together.
Now it's in place on the self, bring the lining fold into position on the other side of the zipper. Pin and baste it, then top stitch neatly through all three layers.
Put the other half of the zipper on now and fasten it. Now you can position the other half on the other self fold. Pin it, baste it then test it. If you miss very slightly with the first half of the zipper you can make up for it by positioning the other half accordingly. Make sure it's in the right position. If not, re-pin and re-baste and try again. This is like pockets, in that it'll look bad if it isn't right.
Once you're happy with it, unzip and stitch it to the placket fold. Pin the lining in to hold it and try the jacket on. If the zipper is perfect, pin then baste the lining on, try it on again and when you're happy, top stitch through all layers again.
Cut that thread before anyone sees it

The two rows is sub optimal, visually

The mannequin likes it
Didn't complain about the back either
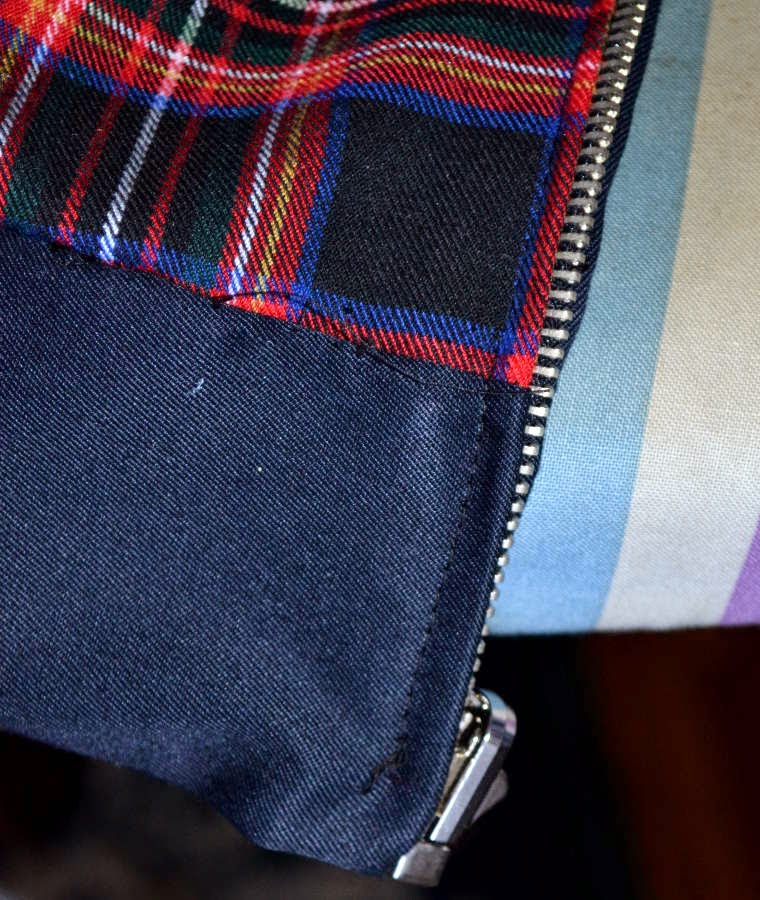
Reversed it looks a little unusual, but if your personality is unusual, a tartan jacket might tick all the boxes.
Even has an external pocket

This garment was sewn on my 1959 Singer 320K.

Tuesday, 9 December 2014

Harrington in detail part 2

I was determined to finish this today but can't find the ribbing (for sleeves and bottom of the jacket) and had to stop again. Anyway, took loads of pictures, so here we go with the self (which is now complete).
Wrong side piece of back facing
This had to be overlocked (or serged in the U.S.) then turned under. As I've mentioned before, the 1890s narrow hemmers found in puzzle boxes are brilliant for this. They will fit an overlocked edge and will turn only once. In the other pics, this piece looks like a bat wing and goes on the inside of the upper facing.
Phoaah! Look at her go. Lovely work

These were sewn together. Notice that I always pin, baste, sew.
Remember also that you need to remove the pins after basting and before sewing. There are several advantages to the basting. Here are a few:
1. Chances of sticking a pin into your skin are reduced about 95%
2. The fabrics both sit flatter against each other and are much less likely to move during sewing.
And a few hints about basting:
1. When basting a tricky bit (sewing anything that has ease, sleeves, etc.) or when matching a pattern, make your stitches smaller. The reason is obvious if you have ever tried sewing after just pinning alone!
2. Use a weak thread. I didn't in this case, because I didn't have any weak, brightly coloured thread. Weak threads are easier to remove if you have to break them. Very old cotton thread tends to be very weak. It's useless for sewing. This is why old garments tend to fall apart - sewn with cotton, which falls apart with age.
3. Use contrasting thread. Easier to see.
4. Don't baste exactly where you're going to sew, or you won't easily be able to remove the thread afterwards.
Same as previous photo, but sewn now
Sewed bat wing shaped facing piece from first two pics to the large facing piece

Back facing in place. Bat wing from first pics is underneath now
Press now and bar tack the two points at the bottom of the facing.
Sew shoulders together, press seams open
 When putting any top together, you need to sew the shoulders together at the start of assembly (that's what we're starting to do here). It's like cooking in that way (don't get me started on cooking, that's a whole 'nother blog) in that everything needs to be prepared before putting it together.
Sew the sleeve in
Sometimes you'll be sewing the sleeve together and then inserting it. In this case, we are doing a "drop shoulder" so we sew the sleeve and side together in one go.
Putting it around an imaginary arm helps to ease

Really important to baste the sleeve after pinning due to ease

After stitching, no pleats or puckering.

The sleeve and side will be matched RST and stitched in one go. Pin,

Baste

Looks like this

Turned the right way, it's taking shape
 The collar is next. It will be sewn RST, one to each side of the collar.
Prepare collar. Stitch down the side and across to the nick

Trimmed and turned, and with topstitching


The white part is the interfacing inside the collar

Looks like this after stitching. Must be precise here.

Collar must be stitched together, jacket is almost done.